The Problem
There’s a lot of articles and tutorials on the Internet on how to host a static website with AWS S3, but most of them include two very common problems:
Problem #1: Use AWS S3 static website hosting feature, but no Cloudfront. If you do that, you won’t have custom domain with SSL and therefore no https access to your website.

Problem #2: Allow public access to the bucket (un-check “block all public access”). This is a bad practice because it may lead to security issues.

The solution.
In this article we’ll explain the right way of doing it. We’re assuming you’re already familiar with AWS Management Console and DNS management. Let’s get to it:
Step 1. Go to AWS Certificate Manager and issue a certificate for the domain you’d like to use for the website (e.g. mywebsite.com).
- Important: make sure you’re in the context of us-east-1 (North Virginia).
- Select “Issue Public Certificate” and then choose “DNS validation” as validation method.
- Then pass the validation by adding correct entries in the DNS. Continue to Step 2 when the certificate Status is “Issued”

Step 2. Create an S3 bucket.
- Make sure “block all public access” is ON.
- Be sure to use “Server-side encryption with Amazon S3 managed keys (SSE-S3)”.
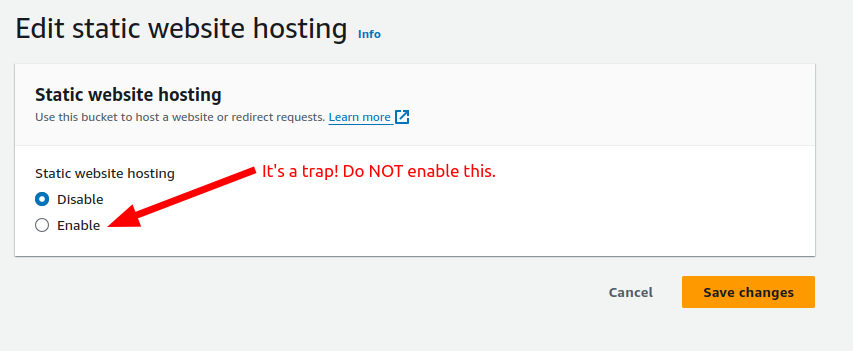
- After the bucket is created, do NOT enable “static website hosting” – this is NOT necessary at all, and in fact can only cause confusion.
Step 3. Create a CloudFront distribution
- Choose the bucket created in Step 2 as origin domain
- In the “origin access” select “Origin access control settings (recommended)”
- Click “Create new OAC” button, in the pop-up window give it a name, and keep other settings at default.
- Select the newly created OAC
- Important: Scroll down to “Alternate domain name (CNAME) – optional”. It is NOT optional, it is mandatory in our case. Enter the domain name you want to use for the app (the one you got the certificate for in the Step 1, e.g. mywebsite.com)
- Important: Scroll down a bit more to “Custom SSL certificate – optional” and select the certificate created in Step 1. Again, this is NOT optional, it’s mandatory for the website to work with https.
- Important: Scroll down to “Default root object – optional”. Enter index.html
- Pick other options per your own needs, or simply use defaults. Usually it’s best to redirect http to https and allow for the widest range of HTTP methods.
Step 4. Wait until the distribution is created (it can be in the “Deploying…” state for a few minutes). Then click on the Distribution, go to the Origins tab, select the Origin and click Edit. In the “Origin Access” section click on “Copy Policy” button, and leave without saving. Then go to S3 bucket created in Step 2, go to Permissions tab, scroll down to “Bucket Policy” section, and paste the policy JSON. Save.

That’s all! You can now upload your website files to the S3 bucket (make sure index.html is in the bucket’s root directory), and it will be available under https and the domain you used.

